CSGO Settings

(Update 2021-May-31)

https://www.nvidia.com/en-in/geforce/guides/system-latency-optimization-guide/

Set up Nvidia Reflex
Pro-settings (last 5 minutes)

Recording the settings I use here for your benefit and mine.

#1 Mouse Settings:

a) Turn off mouse acceleration

b) Gaming Mouse DPI:

400

c) CSGO Mouse settings:

Mouse Sensitivity: 3.09
Raw Input: ON
Mouse Acceleration: OFF

#2 Turn on Digital Vibrance

(This could be on your Intel Graphics Command Center instead – if you are playing on a Laptop)

#3 Steam command line options

-novid -nojoy -high +exec personal.cfg

#4 View the entire map on radar (personal.cfg)

// Radar tweak
cl_radar_always_centered "0"
cl_radar_scale "0.3"
cl_hud_radar_scale "1.15"
cl_radar_icon_scale_min "1"
cl_radar_rotate "1"
cl_radar_square_with_scoreboard "1"

#5 Dot Crosshair (crosshair_dot.cfg)

cl_crosshairalpha "255"
cl_crosshaircolor "5"
cl_crosshaircolor_b "0"
cl_crosshaircolor_r "0"
cl_crosshaircolor_g "255"
cl_crosshairdot "1"
cl_crosshairgap "0"
cl_crosshairsize "0"
cl_crosshairstyle "4"
cl_crosshairusealpha "1"
cl_crosshairthickness "2"
cl_fixedcrosshairgap "0"
cl_crosshair_outlinethickness "0"
cl_crosshair_drawoutline "0"

#6 Jump Throw Bind

alias "+jumpthrow" "+jump;-attack"; alias "-jumpthrow" "-jump"; bind alt "+jumpthrow"

#7 Solo Practice Config (practice.cfg)

// Server config
sv_cheats 1
mp_limitteams 0
mp_autoteambalance 0
mp_roundtime 60
mp_roundtime_defuse 60
mp_maxmoney 60000
mp_startmoney 60000
mp_freezetime 0
mp_buytime 9999
mp_buy_anywhere 1
sv_infinite_ammo 1
ammo_grenade_limit_total 5
bot_kick
mp_warmup_end

// Practice
sv_grenade_trajectory 1
sv_grenade_trajectory_time 10
sv_showimpacts 1
sv_showimpacts_time 10

mp_restartgame 1

// Binds
bind / "noclip"
bind . "give weapon_hegrenade;give weapon_flashbang;give weapon_smokegrenade;give weapon_incgrenade;give weapon_molotov;give weapon_decoy"
bind , "cast_ray"
bind p "bot_place"

#8 CSGO Settings

Game

Enable Game Instructor Message: No
Enable Developer Console: Yes
Mini-Scoreboard Style: Just show player count
Display Team Tags in Death Notices: No
Switch Weapon On Pickup: No

Audio

Master Volume: 100%
Voip Volume: 20%
Main Menu Volume: 0%
Round Start Volume: 0%
Round End Volume: 0%
Bomb/Hostage Volume: 30%
Ten Second Volume: 30%
MVP Volume: 0%

Video

Display Mode: FULLSCREEN
Everything: HIGH
Global Shadow Quality: LOW

#9 CSGO Network Settings

cl_lagcompensation 1
cl_interp 0
cl_updaterate 128
cl_cmdrate 128

cl_predict 1
cl_predictweapons 1
cl_interpolate 1
cl_interp_ratio 2

(the ones in bold I had to change, others were already set correctly)

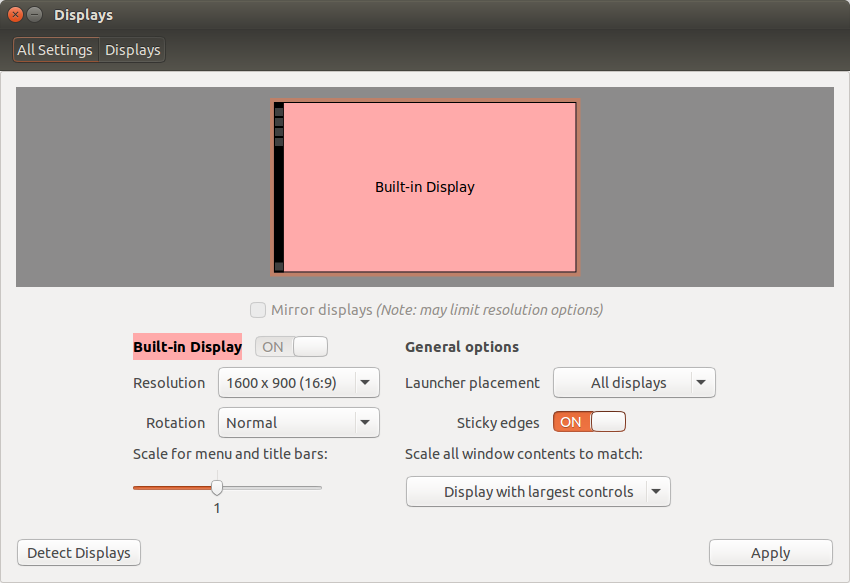
#10 Monitor Frequency

Console Command to check frequency mat_info

Display mode : 1600 x 900 @144Hz

// TODO

  1. Bind for nades
bind "f" "buy flashbang; use weapon_knife; use weapon_flashbang"
bind "t" "buy smokegrenade; use weapon_knife; use weapon_smokegrenade"
bind "q" "buy hegrenade; use weapon_knife; use weapon_hegrenade"
bind "r" "buy incgrenade; buy molotov; use weapon_knife; use weapon_molotov; use weapon_incgrenade"
bind "c" "buy decoy; use weapon_knife; use weapon_decoy"

Share internet Soft-AP hostapd via NAT

Follow up on my earlier blog Run your wifi-dongle as Access Point (Soft-AP) 8188eu on Linux, about using your Wifi dongle as a Wireless Access Point.

We got the WIFI AP started. Next step is to share the Internet connection on the box (enabled via ethernet cable – interface eth0)
sudo sh -c "echo 1 > /proc/sys/net/ipv4/ip_forward"
To set this up automatically on boot, edit the file /etc/sysctl.conf and add the following line to the bottom of the file:
net.ipv4.ip_forward=1

Enable NAT in the kernel & rules to use ethernet interface via wifi interface.

sudo iptables -t nat -A POSTROUTING -o eth0 -j MASQUERADE
sudo iptables -A FORWARD -i eth0 -o wlx00e04c0876f5 -m state --state RELATED,ESTABLISHED -j ACCEPT
sudo iptables -A FORWARD -i wlx00e04c0876f5 -o eth0 -j ACCEPT

Finally persist the iptables configuration and restore it on reboot.

sudo sh -c "iptables-save > /etc/iptables.ipv4.nat"

Now edit the file /etc/network/interfaces and add the following line to the bottom of the file:
up iptables-restore < /etc/iptables.ipv4.nat

and….!
sudo reboot

That’s all folks!


VPN

Similarly, if you have a VPN running on the box. And you want to expose the VPN connection via the Wireless Access Point:

(replace eth0 by tun0 in the iptables above)

Test

curl --interface tun0 freegeoip.net/json/

Or just hit the url freegeoip.net/json/ on your browser.

Source: http://elinux.org/RPI-Wireless-Hotspot

Run your wifi-dongle as Access Point (Soft-AP) 8188eu on Linux

I have got the Soft AP to work in Windows (using the supplied CD) and Linux by following these steps. I was able to connect/get dhcp ip from my Android.

Will update this post with //TODO

1) internet sharing with ethernet or built in wifi interface

2) Start openvpn tunnel and essentially this Access Point will be VPN protected

(think: Netflix; after connecting my Chromecast and Android to this mountpoint)

3) do this on my Raspberry Pi 2 so that my Laptop can get some sleep 🙂

Prerequisite (LOL! Not really! haha):

$ sudo apt install snapd

$ sudo snap install plexmediaserver

$ sudo apt-get install git

$ sudo apt-get install build-essential

$ sudo apt-get install rbp2-headers-$(uname -r)

A. Get the latest driver. Blacklist the staging one

sudo lshw -C network

will show your driver as r8188eu

modinfo r8188eu

is in staging directory.

1.

git clone https://github.com/lwfinger/rtl8188eu

make all

sudo make install

2.

sudo vi /etc/modprobe.d/50-blacklist-8188eu.conf

blacklist r8188eu

3.

sudo reboot

lsmod | grep 8188

should show you ‘8188eu’

sudo lshw -C networkwill still show r8188eu – but that’s OK.

B. Find the wifi interface name

ifconfig

wlx00e04c0876f5 Link encap:Ethernet  HWaddr 

C. Remove existing hostapd and install the patched version

1.

sudo apt-get autoremove hostapd

2.
git clone https://github.com/jenssegers/RTL8188-hostapd

3.

cd RTL8188-hostapd/hostapd

sudo make

sudo make install

4. (Optionally)

cd RTL8188-hostapd/wpa_supplicant

sudo make

sudo make install

5.

sudo vi /etc/hostapd/hostapd.conf

# Basic configuration

interface=wlx00e04c0876f5

ssid=AntMan

channel=6

#bridge=br0

# WPA and WPA2 configuration

macaddr_acl=0

auth_algs=1

ignore_broadcast_ssid=0

wpa=3

wpa_passphrase=ChangePassPhrase

wpa_key_mgmt=WPA-PSK

wpa_pairwise=TKIP

rsn_pairwise=CCMP

# Hardware configuration

driver=rtl871xdrv

ieee80211n=1

hw_mode=g

device_name=RTL8188EU

manufacturer=Realtek

6.

sudo vi /etc/default/hostapd

DAEMON_CONF="/etc/hostapd/hostapd.conf"

D. Adding dhcp capabilities

1.

sudo apt-get install udhcpd

2.

sudo vi /etc/udhcpd.conf

start           192.168.42.2    #default: 192.168.0.20

end             192.168.42.24   #default: 192.168.0.254

interface       wlx00e04c0876f5         #default: eth0

remaining       yes             #default: yes

opt     dns     8.8.8.8 8.8.4.4

option  subnet  255.255.255.0

opt     router  192.168.42.1

option  lease   864000          # 10 days of seconds

3.

sudo vi /etc/default/udhcpd

#DHCPD_ENABLED="no"

E. Setting up the wifi router on static ip and hooking udhcpd start

sudo vi /etc/network/interfaces

auto lo

iface lo inet loopback

auto wlx00e04c0876f5

iface wlx00e04c0876f5 inet static

        address 192.168.42.1

        netmask 255.255.255.0

post-up service udhcpd start

F. Finally restart the services and reboot. You will see Access Point ‘AntMan‘ upon reboot.

sudo service hostapd start

sudo update-rc.d hostapd defaults

sudo reboot

Happy hacking!

Source: https://www.raspberrypi.org/forums/viewtopic.php?f=91&t=54946

Wifi Dongle: http://www.snapdeal.com/product/leoxsys-150-mbps-nano-wifi/1179610 

Create local streaming server on Linux 

I have got this cool raspberry pi 2 setup which is hooked to my TV as a Media Center (osmc/kodi) and have got SickRage and CouchPotato installed to fetch my subscribed shows from the internet. Which later OSMC picks up and indexes with all meta and subs. 

openvpn creates a VPN tunnel for all outgoing connections. So I can still use my mobile to ssh to and as a remote for the media center (Yatse). 

Yatse doesn’t let me play videos I have on Rpi on my Phone (even when I am on the same network) under the free app.

So I resorted to dlna/upnp. One option was to switch on dlna /upnp on Kodi/osmc but that would have listed so much data. I wanted more control on what files to expose. So, I started a dlna server on rpi and accessed via VLC on my phone. 

Here’s how!! 

$ sudo apt-get install minidlna

$ sudo vi /etc/minidlna.conf
inotify=yes

media_dir=/path/to/folder
 $ sudo service minidlna force-reload

 $ sudo service minidlna restart

VLC automatically detects the server running on the same network. 

All good! Seeking works great too. 

Add 1600×900 (16:9) resolution to Ubuntu


$ xrandr

# look at the name of your device
# eDP1 connected primary 1440x900+0+0 (normal left inverted right x axis y axis) 344mm x 193mm
# HDMI1 disconnected (normal left inverted right x axis y axis)
# VGA1 disconnected (normal left inverted right x axis y axis)
# VIRTUAL1 disconnected (normal left inverted right x axis y axis)

$ xrandr --newmode "1600x900_60.00" 118.25 1600 1696 1856 2112 900 903 908 934 -hsync +vsync
$ xrandr --addmode eDP1 "1600x900_60.00"
$ xrandr --output eDP1 --mode "1600x900_60.00"

display_1600_900

source: http://ubuntuforums.org/showthread.php?t=1966900

update: Add it to your dm startup script

Find out what’s your default dm:

$ cat /etc/X11/default-display-manager

Eg. try adding pre-start or post-start scripts to /etc/init/lightdm.conf

How to install deluge bit-torrent client on OSMC Raspberry Pi

My RPi runs OSMC with SickRage, CouchPotato and Transmission-daemon.

I have been using transmission-daemon for sometime and it works great. Recently I had some I/O trouble with a big torrent and decided to install another BitTorrent client on the box – just in case.
I tried to look around but couldn’t get any other known torrent clients installed on the ARM box (absence of the binaries you can say). There are ways to get x86 utorrent binary installed on RPi but I didn’t want to go that far.


#Install the required packages

sudo apt-get install deluged deluge-web

#Set your auth credentials

sudo echo "osmc:osmc:10" &gt;&gt; /var/lib/deluged/config/auth

#Change various settings, seed-ratio; download directory etc

sudo vi /var/lib/deluged/config/core.conf

#restart the service to take effect

sudo service deluged restart

#check out if the service started OK

stty cols 2000

sudo service deluged status -l

#Create the web ui service

sudo vi /etc/systemd/system/deluge-web.service

[Unit]
Description=Deluge Bittorrent Client Web Interface
After=network-online.target

[Service]
Type=simple

User=osmc
Group=osmc
UMask=027

ExecStart=/usr/bin/deluge-web

Restart=on-failure

[Install]
WantedBy=multi-user.target

#Set the service to start upon system startup

sudo systemctl enable deluge-web.service

#Now start the service for the first time.

sudo service deluge-web restart

sudo systemctl start deluge-web

#Go to URL

http://<<RPi URL>>:8112/

#Enter the default password:

“deluge”

#Set a new password.

#Connection Manager:

Add:

localhost

58846

osmc

osmc

That’s all folks!

This is how you compile the jdk

Yeah – download the sources, install the required libraries, compile. Simple!

WHY would anyone want to do that?
Not entirely for the kicks, I must tell you. Or for the fact that it is open source and you can get your hands on the sources. Or for running your cpu at 150% and making it impossibly hot? Well if you are in search for drama – we can exchange laptops (Though I may be forced to get a replacement soon 😛 )!

I recently was on an ‘Advanced Concurrency’ training (No! I wasn’t the instructor) and that’s where I picked this idea of compiling the JDK (Wouldn’t it make a very good friend once you get to know him?). You can make some low level changes (Think: Go Deep! The JVM level?). Our instructor did something very cool. He was trying to show us how modern JVMs, on runtime, do dynamic compilation and give massive performance boost. To show us that and for even much more (to look under the hood), he added his own code to the debug-jdk and from that marriage, something beautiful was born. He could map his source-code with the jvm-optimized-one.

JDK8 is required for the compilation process to begin so please get that first.

We’d be compiling JDK9 (which is still in Development).

# scm is done using hg - mercurial
$ sudo apt-get install mercurial
# tell hg your name
$ echo "[ui]" >> ~/.hgrc
$ echo "username=nikunjlahoti" >> ~/.hgrc

# clone the dev branch of jdk9 to a folder called 9dev
$ hg clone http://hg.openjdk.java.net/jdk9/dev 9dev
$ cd 9dev/
# Next execute the get_source.sh script to download everything in the forest
$ chmod u+x ./get_source.sh
$ sh ./get_source.sh
# this may take some time & bandwidth

# Reading the README would make things more clear. Do open the README-builds.html
$ cat README
# Configure the environment
$ bash ./configure
# Configure may fail when a particular dev library would not be present.
# It would tell you what to install to fix that issue. And run Configure again.
# Below is a list of libraries which were missing from my Ubuntu 14.04
$ sudo apt-get install libX11-dev libxext-dev libxrender-dev libxtst-dev libxt-dev libcups2-dev libfreetype6-dev libasound2-dev

# Begin the compilation
$ make all

Build Statistics:
On my machine Linux 3.13.0-35-generic x86_64 x86_64 GNU/Linux it took around 40 minutes.

## Starting verify-modules
Checking dependencies across JDK modules
Access verification succeeded.
## Finished verify-modules (build time 00:00:59)

----- Build times -------
Start 2014-09-18 00:06:26
End   2014-09-18 00:46:02
00:00:59 verify-modules
00:39:36 TOTAL
-------------------------

Finished building OpenJDK for target ‘all’
Thu Sep 18 00:46:02 IST 2014

How to execute

$ cd 9dev/build/linux-x86_64-normal-server-release/jdk/bin
$ ./java -version
# openjdk version '1.9.0-internal'
# OpenJDK Runtime Environment (build 1.9.0-internal-nikunj_2014_09_18_00_01-b00)
# OpenJDK 64-Bit Server VM (build 1.9.0-internal-nikunj_2014_09_18_00_01-b00, mixed mode)

git: sparsecheckout: Partially pull a repo

So I got this Firefox Device (called Intex Cloud Fx) a couple of weeks back but still couldn’t switch to it (the cold turkey way) as the keyboard application is still in its infancy and I can barely type on QWERTY anymore (long sentence?)!

I decided to dive right into it. I spent my weekend trying to understand the OS better and managed to push some test applications to the device (and they worked! And I could even debug them from my browser! Cool stuff!).

The end game (more like the next goal) is to get/create a keyboard app which has the placement of keys that my mind would understand. (Think: Colemak)

To do that, I started looking around for examples and that’s when I found something and forked it immediately 🙂  test-keyboard-app

To pull that repository on my laptop was truly intimidating (it’s a full blown Operating System after all). That’s when I found out what magic git sparsecheckout could do.


$ git init repo

$ cd repo/

$ git remote add -f origin https://github.com/nikunjlahoti/gaia.git

# Updating origin
# remote: Counting objects: 356086, done.
# remote: Compressing objects: 100% (105268/105268), done.
# remote: Total 356086 (delta 245156), reused 356086 (delta 245156)
# Receiving objects: 100% (356086/356086), 817.56 MiB | 892.00 KiB/s, done.
# Resolving deltas: 100% (245156/245156), done.

$ git config core.sparsecheckout true
# Specifying the intention now

$ echo "dev_apps/test-keyboard-app/" >> .git/info/sparse-checkout
# list of directories to be included

$ git pull origin master
# From https://github.com/nikunjlahoti/gaia
# * branch master -> FETCH_HEAD

$ ls -a
dev_apps .git

# voila

#NoteToSelf #LetTheFunBegin

Intex Cloud FX: Turn Debugging On

…and the tinkering shall begin!

Well it doesn’t work out-of-the-box and this post will help other developers get their hands dirty quickly.

One can debug either by using the “adb tools” by Google or “app-manager” by Mozilla.

#1: Enable Debugging on the phone

https://developer.mozilla.org/en-US/Firefox_OS/Debugging/Developer_settings

On your phone go to: Settings -> Device Information -> More Information -> Developer

Set: ‘Remote debugging’ to ‘ADB and Devtools’

#2: Find out the USB Vendor ID

http://developer.android.com/tools/device.html

$ lsusb
Bus 005 Device 003: ID 1782:5d04 Spreadtrum Communications Inc.

From above we found out that the VendorID=0x1782 (running `lsusb -v` gives a verbose output and prints values in Hexadecimal)

#3: Tell adb to look at this new device of ours

A) UDEV

Log in as root and create this file: /etc/udev/rules.d/51-android.rules.

$ sudo cat >> /etc/udev/rules.d/51-android.rules
# Paste:
SUBSYSTEM=="usb", ATTR{idVendor}=="1782", MODE="0666", GROUP="plugdev"
# CTRL+D to save the file

B) Restart UDEV

$ sudo /etc/init.d/udev restart

C) adb_usb.ini

$ cat >> ~/.android/adb_usb.ini
# Paste
# 1 USB VENDOR ID PER LINE.
0x1782

(You need to have adb installed before we move ahead: https://developer.mozilla.org/en-US/Firefox_OS/Debugging/Installing_ADB)

#4: Tinkering shall begin

$ sudo adb devices

Will show you your device.

if you see something like

List of devices attached
????????????    no permissions

then

$ sudo adb kill-server
# now try adb devices again
$ adb shell
# enter the device

All well! 🙂

Intex Cloud FX:
OS Version: Intex_Cloud_FX_V07
Hardware revision: sp8810
Platform version: 28.1
Update Channel: release-spreadtrum
Buy: for INR1999/- on Snapdeal.com

Using the App Manager:
https://developer.mozilla.org/en-US/Firefox_OS/Using_the_App_Manager

Sources:
http://developer.android.com/tools/extras/oem-usb.html
http://developer.android.com/tools/device.html
http://stackoverflow.com/questions/17763728/getting-manufacturer-vendor-id-for-adb
http://stackoverflow.com/questions/6484279/detecting-device-for-debugging-adb-does-not-work

Getting back to Sony Xperia SL: LT26ii: nozomi: 4.1.2

I spent the previous night getting Xperia SL back to stock 4.1.2 (Build Number 6.2.B.1.96)! That absolutely deserves recognition and some documentation.

After spending countless hours (experimenting with the ROMs) over the past year, I have realized that Stock Jellybean 4.1.2 is adequately stable (=something you would want to use on a daily basis) – and anything else isn’t just good enough! The developers are trying very hard to support it but lets face it – its ancient and now even the developers do not own it.

So that’s what I wanted to do – go back to the pavilion.

Notes:

  • Xperia SL is supposed to be an improvement over Xperia S. Didn’t quite become a hit.
  • Most ROMs would only be found for “Xperia S” and would require changing the install script to either omit the device check or modify it. Therefore, the hardware capabilities also get limited to that of Xperia S – which feels somewhat frustrating.
  • “Sony PC Companion” wouldn’t touch your device if your bootloader is unlocked.

Noteworthy ROMs:

  1. ParanoidAndroid/SlimBean: Nifty features. But highly experimental. (~Dec, 2013)
  2. Cyanogenmod 9.1.0: The last official stable release for the device.
  3. OpenSemc: (beta) Incredible effort by devs to get Kitkat 4.4.2 on SL (built on top of unofficial Cyanogenmod 11).
  4. MIUI v5: I couldn’t try this one on. #4.4.4 #ClosedSource

Getting Back to Stock

Things we need:

  • flashtool: using Flashtool (available on unix/windows/mac), Stock FTF images can be flashed on the device without much ado. Locking/unlocking bootloader.
  • Xperia SL LT26ii_6.2.B.1.96 Firmware FTF – firmware for India (but I don’t want to not be a cynic; so lets override this later)
  • Sony PC Companion – your device, automatically suggests to install it – once you connect it to the PC (over USB)
  • Emma: Official Flash Tool for Xperia devices. Meant to be used by developers for devices with unlocked bootloader. Doesn’t work with Xperia SL but works with Xperia S.


#1 Install and set Flashtool up

Put the LT26ii_6.2.B.1.96_Generic.ftf inside the firmware directory inside the installation. Run as admin. Click on the Bolt button on the left – “flash” > select “flashmode”

#2 Connect the device is flash mode

After step #1, the tool will request you to turn off the device and insert the USB wire while pressing volume down key – to go to the “flashmode”.

#3 Once the procedure completes, disconnect the USB and turn on the device. Ensure that all is well.

#4 Lock the bootloader now:

Turn off the device and hit BLU button (not blue) on flashtool. Connect the device in flashmode. Relock!

#5 Turn on the device and start Sony PC Companion. 

Now the companion would recognize the device. Click on the device status. In the popup click on repair.

(Steps #3 – #5 are optional; Blame the security)


Now the big question is that what am I gonna do with the device now that its back to normal. Well I may have thought of something 🙂


Break something, struggle with it and then get that fixed. That does raise the value of the Object.


Source:

http://wiki.cyanogenmod.org/w/Install_CM_for_nozomi

http://xperiafirmware.com/8-firmware/13-sony-xperia-s-lt26

http://forum.xda-developers.com/showthread.php?t=2245327